One thing SmartThings did well was their door/window/multipurpose sensor. (I purchased the few I have from Amazon but while I’m writing this they’re unavailable there—not sure why.)
These sensors are a standard magnetic reed switch (the little part is just a magnet) paired with a temperature sensor and accelerometer. One thing you could do with the SmartThings software was chuck the magnet part and use the sensor in “garage door” mode. You affix the sensor to the inside of the garage door and then SmartThings interprets the tilting of the sensor from vertical to horizontal as the door raises as open/closed instead of the magnetic switch.
In this post I’ll show how to get the same thing with Home Assistant to see the status of a garage door, mailbox, etc.
The SmartThings sensor
When you pair one of these sensors with Home Assistant you get four associated entities:
- A
binary_sensorfor the accelerometer - A power sensor for the battery level
- A temperature sensor
- A
binary_sensornamedias_zone
I have no idea what ias_zone means but what it really means the magnetic switch. So when you’re using the sensor without the magnet on something like a garage door, this is always going to be open. So the first thing I would do after pairing this device is to disable the ias_zone entity, since it’s useless.
Nowhere in the state or attributes for these entities is anything related to the position or orientation of the sensor:
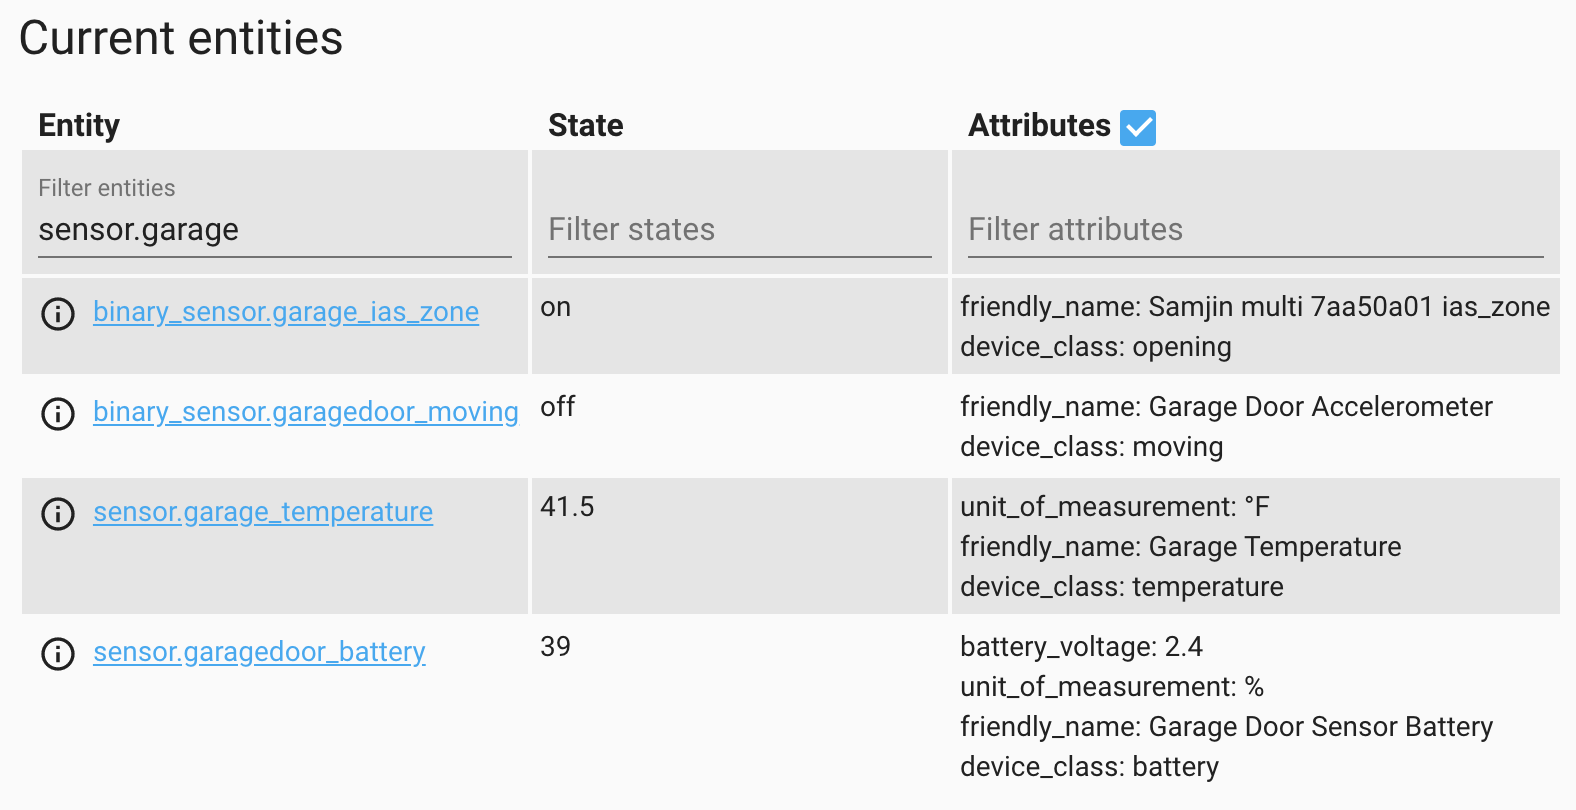
However, this information is conveyed through events.
zha_event
The sensor will broadcast x-axis, y-axis, and z-axis values as separate events. I don’t know exactly how these values are defined, but it really doesn’t matter. All we need to do is install the device in the desired location and then measure.
First, let’s see the events in action:
- Go to Developer Tools > Events.
- Under Listen to events enter
zha_eventand click Start Listening. - Raise or lower the garage door.
- Watch a few events come in.
- Click Stop Listening.
Here’s an example event from my garage door:
1 | { |
The important parts are:
- One of the ids, either
device_ieee,unique_id, ordevice_id. I preferdevice_ieeebecause the same value is easily visible on the device info page. - The
data.args.attribute_name, in this casex_axis. - The
data.args.valuewhich, in this case, is the value of the x coordinate.
Measuring the door
We want to measure the extremes of the X/Y/Z values when the door is all the way up and all the way down. To do that we can create helpers.
- Go to Configuration > Helpers.
- Click Add Helper.
- Click Number.
- Enter values:
- Name =
Garage X - Ignore icon, this is only temporary
- Minimum value =
-1200 - Maximum value =
1200
- Name =
- Click Create.
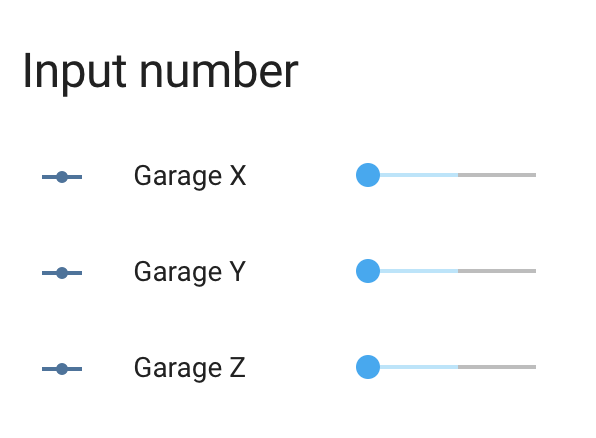
- Create two more helpers for
Garage YandGarage Z.
If you’re using the default auto-generated dashboard they’ll look like this:
Now to fill them with data, I created an automation:
1 | alias: Set Garage XYZ |
Some notes:
- In the trigger section, the
device_ieeeneeds to match the value for your sensor so that we filter out other sensors. - The actions section contains 3 conditions to match either
x_axis,y_axis, orz_axisand then to set the appropriate helper value. Make sure theentity_idfor each call to theinput_number.set_valueservice matches the ones you created. - I set the mode to
queuedand the max to a relatively high value of20. I don’t know how quickly these will get processed but I know that they come in at least 3 at a time, one event for each access. I don’t really want to discard the X coordinate event because the Z coordinate bumped it out of the queue.
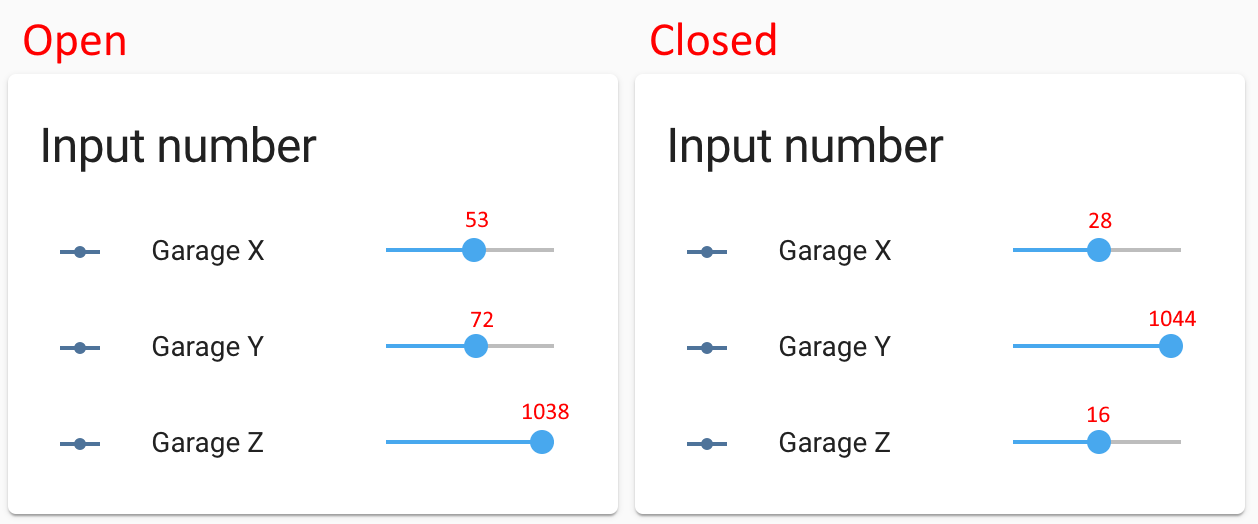
Once this automation was in place, I raised and lowered the garage door. Here are two screenshots, along with the value of each helper that I added in red:
What does “open” mean?
Now that we’ve got numbers, we need to figure out how to define open and closed. The numbers won’t be exact each time, so we need one of the axes to have some daylight between them so that the transition will be completely obvious.
In this case, X is completely out as the values are only a couple dozen apart. Either Y or Z are a good candidate though, as both are about 1000 apart between the fully-open and fully-closed states.
You can’t just assume though. Depending on where you place the sensor, it could be completely different. The garage door sensor goes from being vertical when closed to horizontal (pointing down) when open. On the mailbox door, however, I affixed the sensor pointing “up” when the door was open, and when you close the mailbox the sensor is vertical but upside-down. The result is that the axis you choose and the threshold for open/closed will be different in every situation.
In the garage door case, I decided to go with the Z axis, which is partially a coin flip between Y/Z, but since garage doors go “up” and “down”, Z-axis seems to make sense to me.
As for the value, if for some reason the garage door is halfway open, I still consider that open. So rather than take the halfway point of ~500 I instead chose to define open as being any value greater than 200.
Open helper
Armed with this information, I can create a new helper of type Toggle, and call it Garage Door Open. I recommend the icon mdi:garage.
I can disable the automation we just used, or delete it, along with all the numeric helpers.
This new automation will set the state of the Garage Door Open helper:
1 | alias: Set Garage State |
Again, note that:
- The
device_ieeemust match your device. - The
entity_id(used twice) must match the Toggle helper. - We’re still filtering on one axis’s events, so the queue makes sure we don’t lose important events.
Now, you can raise and lower the garage door and watch the value of the helper flip back and forth. And now that there’s a helper, we can use the value in other automations.
For instance, I get a notification when my mailbox is opened, but ONLY when the front door is locked and the garage door is closed. Otherwise the person opening the mailbox is not the mail carrier, it’s a member of the family.
I also have an automation that announces there is someone at the front door, but only if the front door and garage door are closed.
A finishing touch
One problem is that because the helper is an input_boolean it’s always going to be editable on any dashboard you include it on, because anything input_* is designed in Home Assistant to be editable, period, while sensors are read-only.
If you wanted to display the value on a dashboard as read-only, you would need to create a template binary sensor, which basically means a sensor that gets its data from another entity according to a template. You could also keep one of the XYZ axis helpers from before and define a template binary sensor based on the numeric value.
However, I have found that it can be useful to be able to switch the helper to the incorrect state for a time, so that I can test what an automation would do with the garage door open, without actually needing to open the garage.
Wait, I live in Minnesota
I mentioned that I use one of these sensors in the mailbox, so that I can tell when the mail has been delivered. However, I live in Minnesota and it’s just a few days before Christmas.
That means it’s cold.
The mail call automation worked for just a few abnormally warm days, but then the temperature dipped and the automation stopped working. The Energizer CR2450 Lithium batteries I’ve got (and all lithium batteries generally) are not a fan of the cold weather. These Panasonic batteries boast an operating range of -30°C to +60°C (or -22ºF to +140ºF) but I have not tried them yet.
Summary
This post showed how to capture the X/Y/Z axis values of a SmartThings door/window multipurpose sensor and interpret those values as open or closed for a garage door, mailbox door, or other application where the magentic reed switch is not viable.
It’s possible the same procedure could be used on other types of sensors that include an accelerometer as well.
I have not tested it yet, but I wonder if this would be useful for applications like:
- French patio doors, or casement windows that crank out. Unlike a garage/mailbox door, the orientation of the sensor relative to gravity never changes, so I don’t know if the reported coordinates would vary enough to trigger on.
- Sliding porch doors, where the sensor would only slide left or right, but never really change orientation.
If you try any of those, let me know!
]]>